Quick Start
Drona Workflow Engine is a React/Flask application that provides a graphical interface for creating and submitting HPC jobs. This guide covers the essential steps to get it running.
Prerequisites
- Python 3.8+
- Node.js and npm
- Git
Installation
Clone the repository and run the setup script:
git clone https://github.com/tamu-edu/dor-hprc-drona-composer.git
cd dor-hprc-drona-composer
./setup
The setup script creates a Python virtual environment, installs all dependencies, builds the frontend, and creates the necessary directories (environments/, logs/). For a detailed breakdown of what the script does and manual installation steps, see the Installation guide.
Configuration
After setup, review config.yml in the project root. The setup script will populate some values automatically, but you should verify the following:
development: &common_settings
  cluster_name: "Grace"                      # Display name for your cluster
  modules_db_path: "/path/to/modules/bin/"   # Path to modules database script
  driver_scripts_path: "/path/to/machine_driver_scripts"
  env_repo_github: "https://github.com/..."  # Repository for importable environments
cluster_name— Used internally and displayed in form titlesmodules_db_path— Required by the module form element to retrieve available modulesdriver_scripts_path— Absolute path to themachine_driver_scripts/directoryenv_repo_github— GitHub repository that powers the environment import feature
For additional configuration options and cluster-specific adjustments, see the Installation guide.
Adding Workflows
Drona looks for workflows in two locations:
-
System workflows — Placed in the
environments/directory within the Drona installation. These are available to all users and appear in black in the dropdown. Administrators manage these by adding workflow directories directly toenvironments/. -
User workflows — Stored in each user's personal directory at
$SCRATCH/drona_composer/environments/. These appear in blue in the dropdown. Users can import workflows through the UI by clicking the + button next to the environments dropdown, which copies workflows from the configured repository to their personal directory.

The environments/ directory starts empty after installation. We recommend adding at least the Generic environment — examples are available in environments-repo/<clustername>/.
Users can browse and import available workflows from the import window:
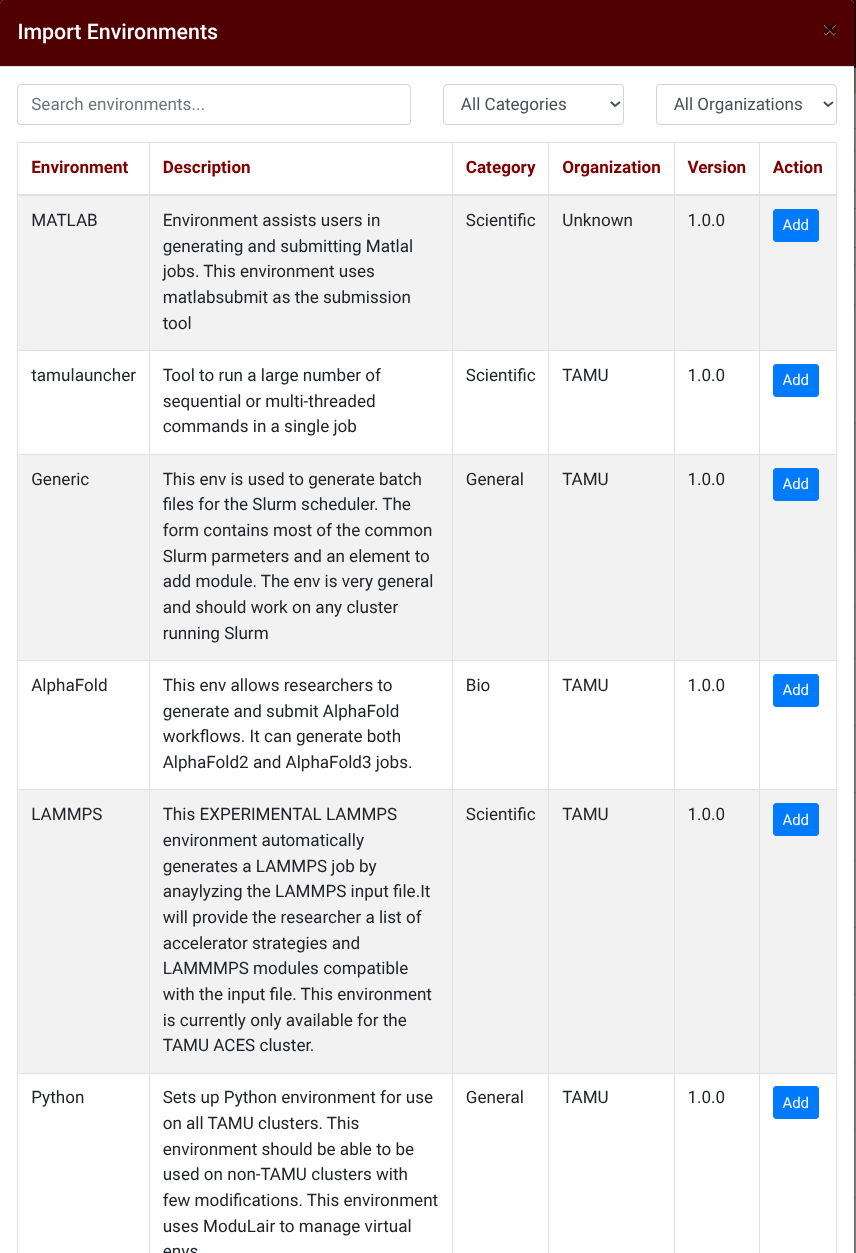
For more on how workflows are structured, see Environment Development. For details on user workflows, see User Workflows.
Next Steps
- Environment Development — Learn how to build and customize workflows
- Schema Files — Define form interfaces with
schema.json - Open OnDemand Integration — Deploy with OOD
Texas A&M University High Performance Research Computing