Using Drona Workflow Engine
Drona Workflow Engine (or just Drona) provides a 100% graphical interface to create and run any workflow without the need to write a Slurm script or even be aware of Slurm syntax. It guides you to provide the relevant information to generate and submit a job for many different workflows and environments.
Accessing Drona Workflow Engine
Drona is available on all HPRC Portals. Once you log in to your favorite portal, go to the Jobs tab and select Drona Workflow Engine. This will open a new window showing the Drona Workflow Engine interface.
First-Time Initialization
When you launch Drona for the first time, you will be prompted to choose where your Drona data should be stored. This location is saved in a configuration file at:
~/.drona/config.json
This file tells Drona where to find and store all of your data. Here is an example config.json:
{
  "drona_dir": "/scratch/user/<username>/drona_wfe"
}
The drona_dir path is where Drona will store your environments, workflows, and job outputs. You can point this to any directory you have access to, such as your $SCRATCH directory on HPC systems.
If you ever need to change your storage location, simply update the drona_dir path in ~/.drona/config.json and restart Drona.
If ~/.drona/config.json is missing or the specified directory does not exist, Drona will prompt you to reconfigure on next launch.
Drona Environments
Drona provides a number of environments to choose from. To select an environment, use the Environments Dropdown.

Drona Workflow Engine checks for environments in the following two locations:
- Drona system directory - System-wide environments maintained by HPRC
$SCRATCH/drona_composer/environments- Your personal environments
System environments appear in black and environments in your SCRATCH directory appear in blue. HPRC provides environments for numerous research areas. Later, we will show how to import additional environments to your SCRATCH directory.
Drona Input Form
Once you select an environment, additional fields relevant to the selected environment will become visible. The following screenshot shows the Generic environment, which is the most flexible and allows you to create any job script.
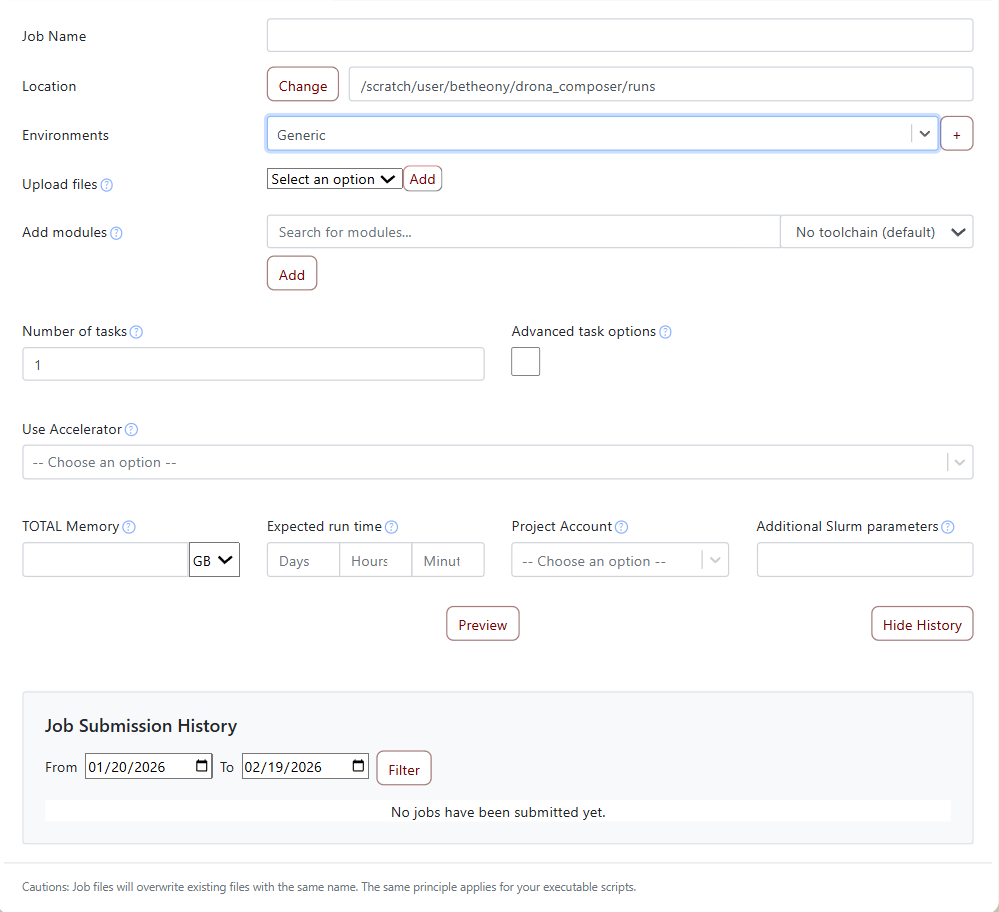
Some of the form's fields include:
- Module element - Easily add all the modules needed in your job script
- File upload field - Upload data and scripts
- Accelerator field - Specify what kind of accelerator (if any) you want to use
- Resource fields - Specify common job requirements and advanced batch scheduler-specific options
For other environments, these fields will be very different and specific to that particular environment.
To get additional information for any of the input fields, hover over the little question mark icon. It will show additional information and help.
You are not required to enter values for all (or any) of the fields. When no value is specified, Drona Workflow Engine will use default values. Once you are finished entering values, click the Preview button.
Drona Preview Window
After clicking Preview, a preview window will appear showing the generated job scripts and any validation messages.
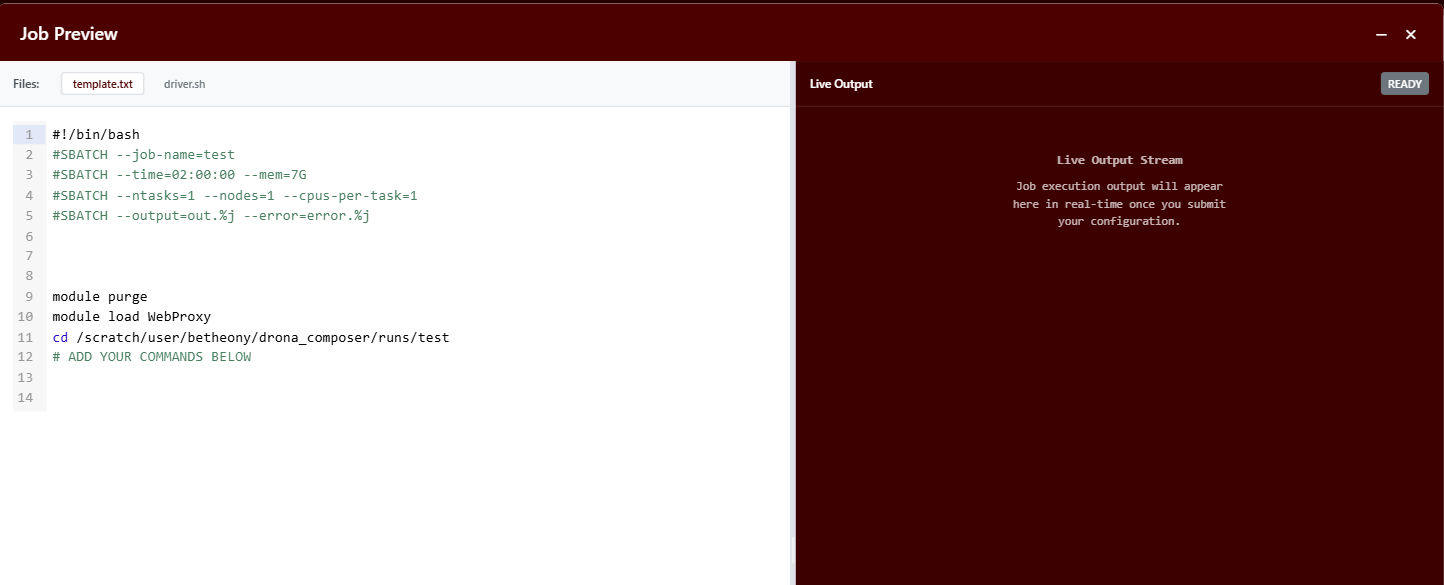
The preview window contains the following components:
Message Pane
Drona analyzes the provided input values to make sure there are no mistakes or inconsistencies. The message pane can also show environment-specific messages to assist you.
For example, a warning might indicate that a GPU was requested for 4 days, but the maximum wall time to request a GPU on ACES is two days.
Generated Script Tabs
Drona generates job scripts based on your input. It will insert code for requested modules and changes to the correct directory. For most environments, it will also set up and execute that environment.
All the job script windows are fully editable. For the Generic profile, this is the place where you enter the commands you want to execute in the job.
Importing Drona Environments
HPRC provides environments from a variety of research areas. These environments are available in a repository where you can import from.
Next to the Environments dropdown, you will find a + button. Clicking this button will open a new window with available environments you can import.
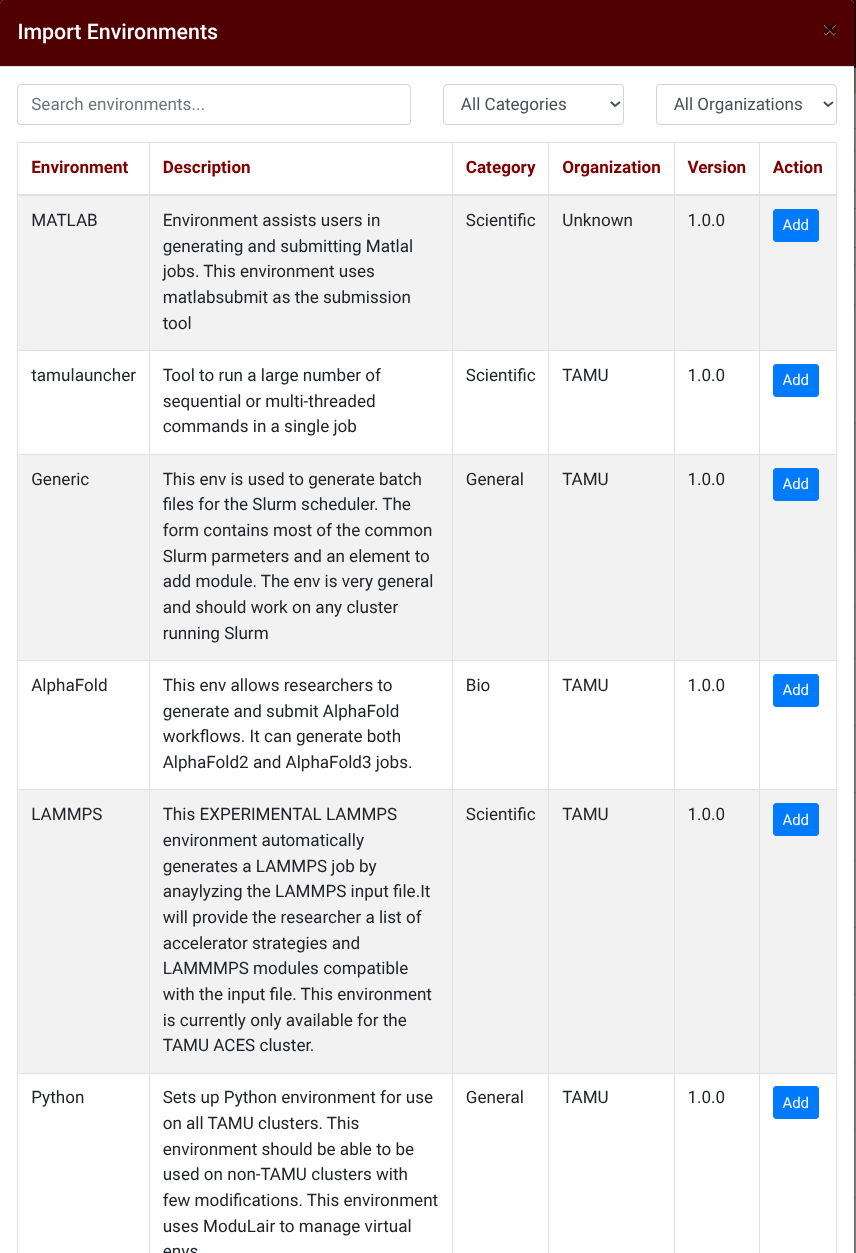
To import an environment, simply click the Add button and Drona will copy the environment to $SCRATCH/drona_composer/environments.
Demo of Drona Workflow Engine
To see Drona Workflow Engine in action, check out the YouTube video below. Note that this is an older version of Drona and some newer features may not be shown.
Texas A&M University High Performance Research Computing